After getting the roof frame ready for the panels, I discovered the frame appeared to be "out of square." This caused the roof panels not to line up with some of the holes in the roof frame (rafters). Comparison of the construction information for the Costco version and the Sam's Club version show some descrepancies. The roof panels in the Costco version are held in place with bolts and small "clamps" where the roof panels join on the top and bottom. The Sam's Club version shows a small clamp at the top where the panels come together and a "clamp" bar on the bottom edge with no bolts going through the roof panel itself. This did answer one of my questions, but I still have the panel edge holes not lining up with the "rafter" holes. After some maneuvering, I was able to solve the problem.
This shows the holes in the bottom of the panel and the holes in the rafter.
This photo shows the "clamp" bar on the bottom of the panel and bolted to the "rafter."
This shows the "clamp" that attaches to the top and goes over the panel.
So, we lifted what is pictured below. I had five guys doing the lifting and three holding and aligning the columns.
Once they got the top and frame on top of the posts, they were bolted together (column to roof frame). Then we squared the columns using a level to make sure that they were plumb.
Then the remaining roof panels, edge clamps and the corner ridge covers were installed.
The columns were also bolted to the concrete using concrete expansion bolts that came with the gazebo kit. One major thing that we encountered was that the measurements from outside of the bottom column trim ring on one side to the same location on the opposite column is 144 inches. However, the top roof. from outside to outside edge is larger. This causes difficulties in determining where the columns need to go. In our case, all measurements were taken from the house outward. We should have included an additional five inches to compensate for the roof overhang.
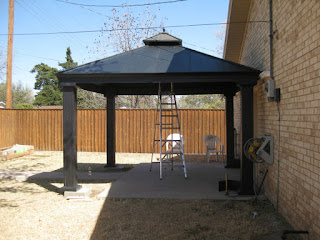
This is what it looks like now that it is up.
Need to add electrical and the ceiling fan/light combo.


No comments:
Post a Comment